| Window
adjustment

A: This gives glass
deflection adjustment (pivoting at waist rail).
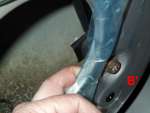
B: This gives glass deflection adjustment (pivoting at waist rail).
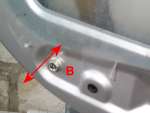
C: This gives glass height adjustment (this is also the glass stop).
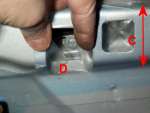
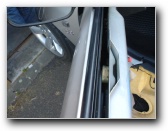
D: This gives glass lateral and vertical adjustment.
E: This gives glass lateral and vertical adjustment.
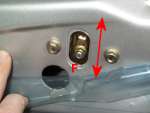
F: These give glass height adjustment (this is also the glass stop).
G: This is used at beginning of adjustment to position the door glass
centrally in waist rail slot. Tighten bolt to 7 Nm.
H: This is positioned at rear glass rail at final stage of adjustment
and tightened to 7 Nm.
1. Remove door speaker.
2. Peel back water shedder to access adjusters.
Height
NOTE: Glass height is correct when pressure is being applied to the
soft part of the cantrail seal.
1. Lower glass slightly and loosen adjusters C and F these also act
as glass stops.
2. Raise glass to height required, pull adjusters down in slots and
tighten adjusters.
3. Lower glass and then raise fully to ensure required height has been
obtained.
Paralellism
NOTE: The glass is parallel when it is in
the fully raised position and there is a
constant clearance of 7 mm between the
glass and the rear face of the ’A’ post.
1. Loosen two height adjusters C and F .
2. Lower glass sufficiently to gain access to adjusters D and E , loosen
adjusters.
3. Lower glass further to gain access to rear sash rail bracket.
4. Loosen adjuster bolt H .
5. Raise glass until adjusters D and E can be accessed, then close the
door.
6. Adjust the position of the glass until it is parallel with the ’A’
post, tighten adjusters D and E .
7. Open door and
lower glass then raise fully, check that front edge of glass and cheater
are in line.
8. Close door by pushing on glass, check glass height.
9. If glass height is correct, pull adjusters down in slots and tighten
adjusters C and F .
NOTE: If glass height is incorrect refer to height adjustment above.
10. Lower glass to access rear sash bracket, tighten adjuster H .
11. Raise glass and ensure it pre-loads all surrounding seals.
12. If pre-load is not sufficient loosen lock-nut on adjuster B .
13. Position adjuster so that it is level with the back of nut it is
screwed in to, this will tilt the top edge of the glass inwards.
14. Tighten lock-nut and check pre-load of glass on seal.
15. If pre-load is still not sufficient loosen bolt G
16. Repeat previous instruction until pre-load is correct.
17. Secure water shedder.
18. Fit speaker
19. Fit door trim casing See doors.
. (same
here as PDF)
|