From:
Julian Bath NIL 8095 on 23 December 2001 at 18:19:35 (UK time)
Of interest to anyone who wants all the warning lights to work on the
dash, I fitted the following to get both seat belt and cat overheat lights
to work (I damaged the cat so went the whole hog)
Catalyst warning light
1. Japanese cat (same price
as UK version)
2. Sensor for cat
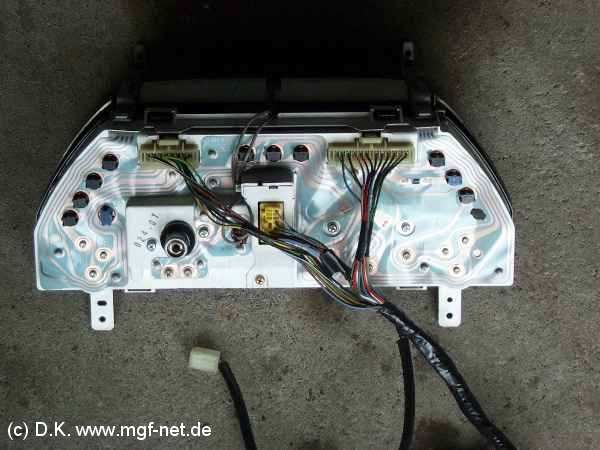
3. Intrument wiring loom (Japanese)with had an additional 'arm' to which
is attached a bulb.This wiring loom also covered the extra wire for the
seat belt warning light
Seat belt warning light
1. Seat belt catch plus pre
tensioner (Japanese)- note do not dispose of old tensioner in bin due
to the explosive charge contained therein. Store it safely or take down
to local MGR dealer for disposal!
2. Instrument PCB (same as UK and small)
Cabling for both already installed between sensors and multi funtion unitabove drivers legs. You will find the cat sensor cable in the engine compartment close to the engine ECU (2 wires leading to a black connector. Mine was hidden between the ECU and fuel cut off switch; for the seat belt the cable and connector is underneath the cubby box between the seats.
Though there is an extra light required in the centre of the consol for the seat belt warning, the PCB is the same as the UK version (ie they are one and the same which I still cannot understand and MGR refused to help). On the PCB there is space for an extra couple of light fixtures but the tracks are all their to fit an additional light fixture. The most difficult bit of all this was attaching the light fixture (which I took from a PCB I purchased) which is attached by pins to the PCB so some careful soldering was required to attach the pins to the PCB.
Both lights work with the cat light being one of the last to go out and of course the seat belt light stays on until buckled up.
Too late of Christmas but a project between Christmas and the new year for those who havn't got better things to do.
Julian
--------------------------------------------------------------------------------
From: Dieter Koennecke Dormagen/Germany
on 23 December 2001 at 20:45:01 (UK time)
Julian ?
wasn't it you who found the mad cigar lighter to be enlightened a couple
of years ago ?
:)
Anyway, nice idea !
Jap spec parts could getta problem.
Please, can you look up the
instrument loom for the difference and/or the position for the missing
wires ?
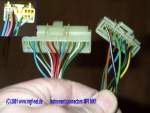
This one is a non-Japanese instrument connectors
http://www.mgfcar.de/navi/instruments_cp_0091_1.jpg
(red arrow is i.e. the speed signal to the EPAS.
Best Regards
Dieter
--------------------------------------------------------------------------------
From: Julian Bath UK NIL 8095
on 23 December 2001 at 22:22:34 (UK time)
Dieter,
You are correct - I was the one who discovered it was possible to illuminate the cigar lighter.
Re the wiring, only one cable is required for the seat belt light (on your diagram fourth from the left on the top of the yellow connector). The green feed to the lamp is picked up directly from the PCB.
On the cat light two wires direct from cat bulb (ie does not go through normal connectors), the green one connects to anyone of the green colours, the other wire goes direct to the multifunction unit below steering column.It is clear from my version of workshop manual (1998)though of course no explanation as to what the feed is (obvious if you are in the know!. With the MGF wiring diagrams it all becomes clear.
As with most mods 90% of the
time is spent thinking and 10% doing. What I had not appreciated until
the end that on the wiring, only three wires are missing plus two bulbs
from the wiring loom, (excl the sensors)and it was not until I got behind
the instrument panel did I appreciate this.Why Rover did not 'finish'
the job at the light end I do not know as it would have avoided two different
instrument wiring looms in the parts book (actually four - Japan/other
and MPI/VVC)
The biggest surprise is the PCB. There must be a different PCB for the
additional light on the Japanese VVC/MPI model but the dealer part reference
only differentiates between VVC and MPI, not Japan and others and Unipart
no nothing about a different PCB and the factory was not exactly helpful
referring me back to Unipart, even though the seat belt light on the PCB
is clearly in a different position from the standard VVC and MPI warning
lights.
On the Japanese parts no problem getting (as easy as getting the standard UK spec parts though note my comment on the PCB above) but do not expect any help from MGR as it is a modification to the standard spec.
I hope the above helps.
Julian


