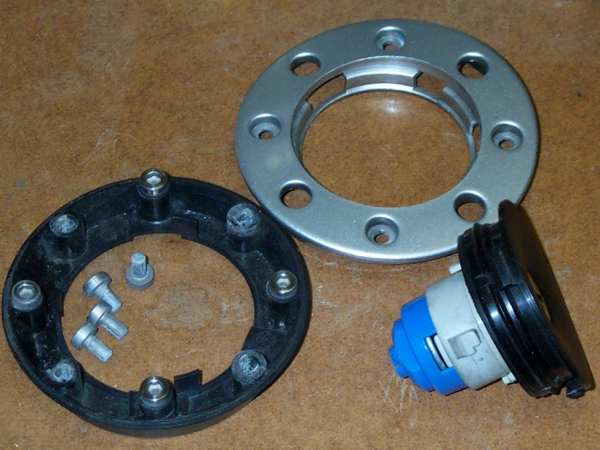
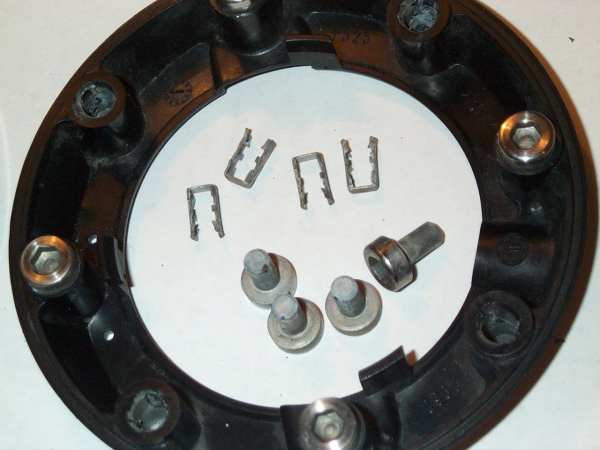
4 der 8 äusseren Zierschrauben sind gerändelte Niete, de einfach ausgedrückt werden können.
It is held by 4 of the 8 outer bolts. (push in rivet, no thread)

 *1)
*1)
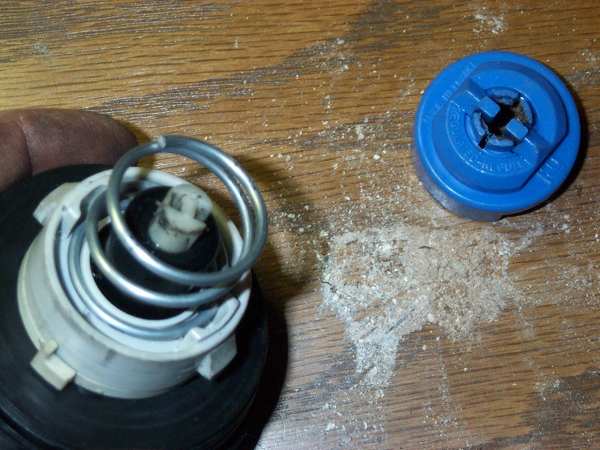
The blue part is pressed direction outside with an inner big coil spring.
 *2)
*2)Hier hält Korosion alles zusammen. Nimm ein Stück Klebeband zum Sichern der Teile bei der Demontage.
*1) Die vier Haken gleichzeitig nach aussen biegen und dabei die blaue Kappe nach aussen ziehen.
Die Bilder zeigen das Resultat, vorher *1) und nachher *2)
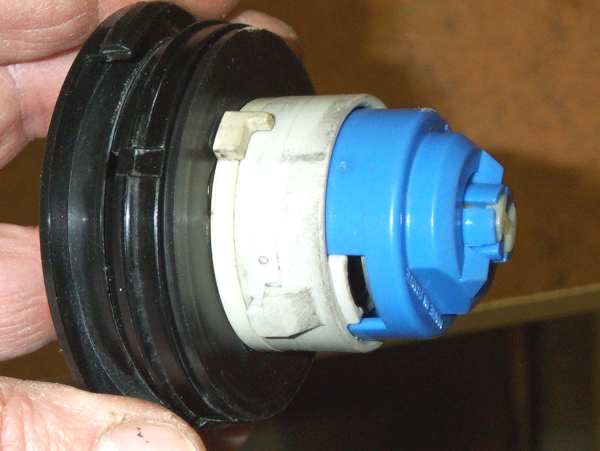
Prevent
from loosing slot blades while pulling the lock apart.
Notice. The lock blades here are held by corrosion derivates in place.
Apply a piece of tape to keep the blades and tiny springs in the lock
body.
*1) Bend all four brackets (see arrrows) outwards and pull at the blue
cap. All brackets must be bended at the same time. You'll need four hands
to get this done ;-)
The pictures shows the result before *1) and after *2) :)
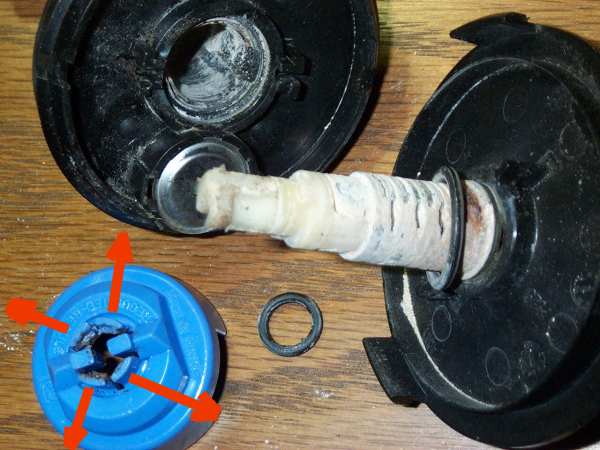
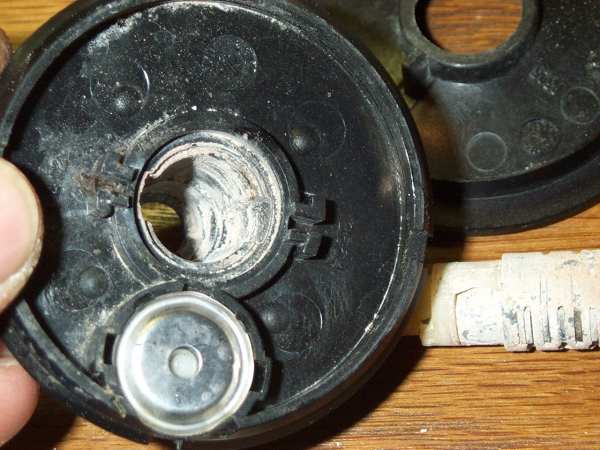
Hier sieht man das Ausmaß der Korrosion. Das weiße Zeug ist Aluminium Oxid.
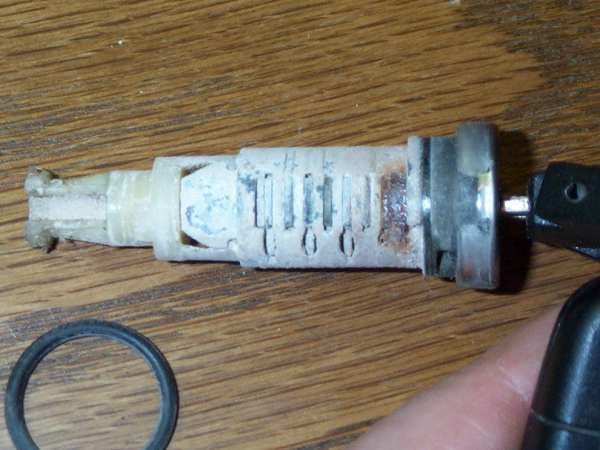
Am Linken Ende das seitlich aufgesteckte Klemmstück.
Zur Reinigung müßen die Schloßblättchen und darunter liegenden Federn einzeln mit Pinzette herasugenommen werden. Die Reihenfolge beachten. (Leider ohne Foto)
Die vordere Abdeckkappe ist mit Rollnietung aufgebracht. ICh hab es vorsichtig mit einem kleinen Schraubendreher nach aussen gebogen und abgenommen.
At the end of the lock body is the white bolt part clamped to the blade body. It can be removed.
You carefuly need to remove the lockblades and small coilsprings and clen them. Notice the sequence of installation !! (no picture unfortunately)
The lock cover plate is mounted with press-fit tool to the plastic body. I carefully bent it towards the circumference with a screw driver later.
Unterhalb der Mitte ist das doppelt wirkende Ventil zur Be- und Entlüftung des Tanks zu sehen.
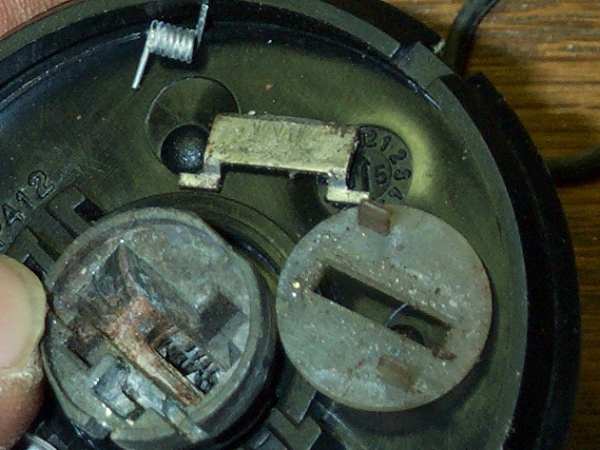
The
housing of the lock cylinder, also full of aluminum oxid grain. This caused
the blockage and made the squeak noise.
See the double acting breather valve below the cap centre.

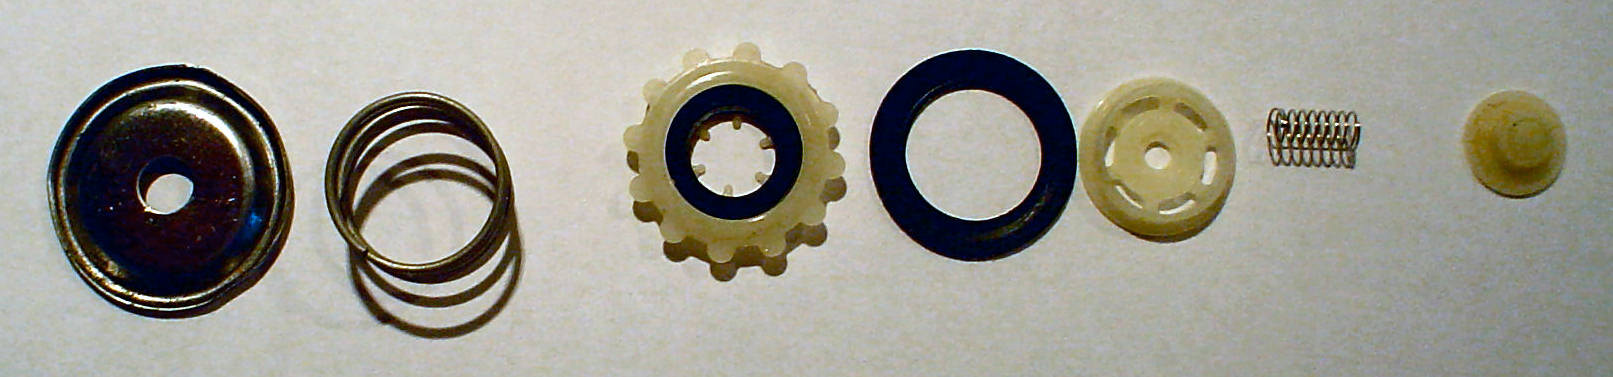
Die Einzelteile des Tankdeckelventils.
Vermutlich ist das äussere große Ventil zum Ablass des Überdruck da.
Das kleine zur Belüftung bei Unterdruck.
The parts of the filler cap valve.
I suspect the larger diameter valve is to release over pressure. While the smaller size may be the valve to let in air on under pressure.
Zum Abschluß die blaue Kappe wieder aufdrücken.
Clean
all parts carefully from aluminum oxid and rust.
I put grease at all moving parts and seals to seal against water ingress.
The lock blades where oiled with graphit oil. This grafit oil gets dry
and only the praphit is left on the surface. At last push the blue cap
on the bolt and check that the little brackets hold the bolt in place.
May be that a copper grease is the best solution for keeping the slot
working ? I don't know. (Rogers suggestion)

Dabei kann nichts schiefgehen, denn die Teile passen nur in einer Rotationsrichtung zusammen.
Final assembly of the outer alloy ring and the plastic cap.
You can't fail the assembly angles, cause the clips mark the correct assembly direction.

Back on my MGF
:oP
A very neat dissection and reassembly!! Perhaps a copper based grease may be better? One very useful point to be made here is that when the lock corrodes to the point where it can't be cleaned up, there is a clear route to fit a new cap AND be able to retain the original key.
To do this will mean carefully removing all the key tongues from their slots, keeping them in order then stripping the new lock and either fitting the tongues from the old lock if they are serviceable or matching up as many old and new as possible then trimming the remaining new ones to match the length of the old. I have done this on door and ignition barrels to retain just the one original key, and it works. The MG Metro on the drive at the moment had to undergo such a treatment around 8 years (and 40 thousand miles) ago due to some 'low life', and it is still fine.
Rog
(message copied from the MG Cars BBS)